 Integrating JotForm Webforms - ΩJr. Publizjr Creates Web Pages
How to include webforms in your Publizjr Generator Templates by using the JotForm webforms service.
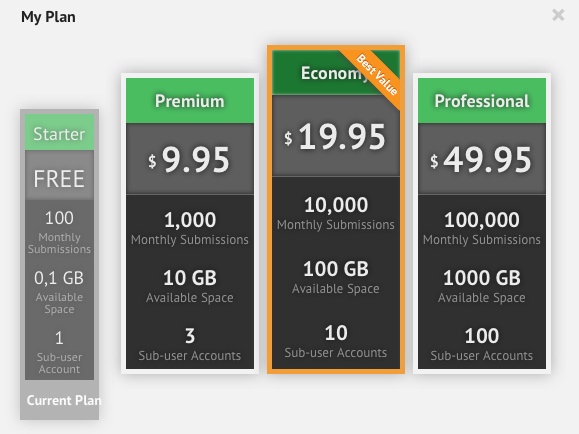
JotForm offers a couple of plans, including a limited free trial, which is excellent for our purposes. It offers e-mail notifiers, collects submissions into downloadable spreadsheets, autoresponders, and integrations with lots of 3rd-party services.
In this example we explore how to include a basic "contact me" form and redirect form users to a "thank-you" page for conversion analytics.
First of all, you need to visit the JotForm.com website: http://www.jotform.com/. Create a new account. It is free and JotForm claims it stays free unless you want something from their paid packages.
Then you create a simple form with just a single textarea (let us name it “Contact Info”) and a single submit button (which we title “Send”). You could title the form “Contact Me”, for easy recognition later.
Do not worry about any of the other properties, like the visual design or whether the field is required: we are not going to use them in this example.

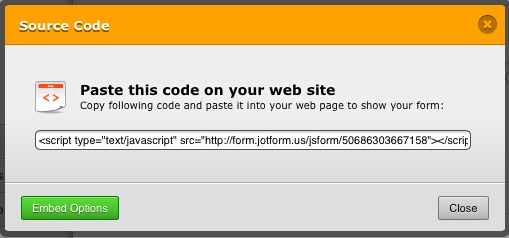
This opens the “Source Code” dialog which sports a button labeled “Embed Options”:
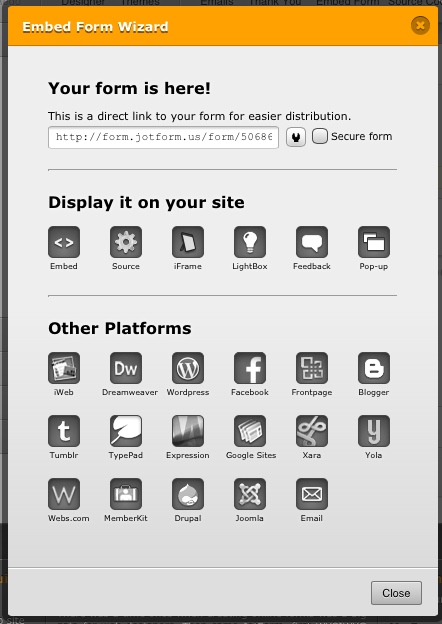
Pressing that button opens the “Embed Form Wizard” dialog:
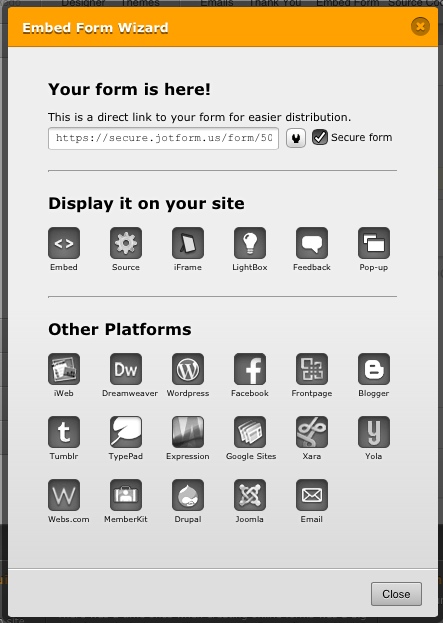
Here, we first enable the choice to post form submissions via a secured connection:
Then we press the icon labeled “source”, which slides the source code text box into view:
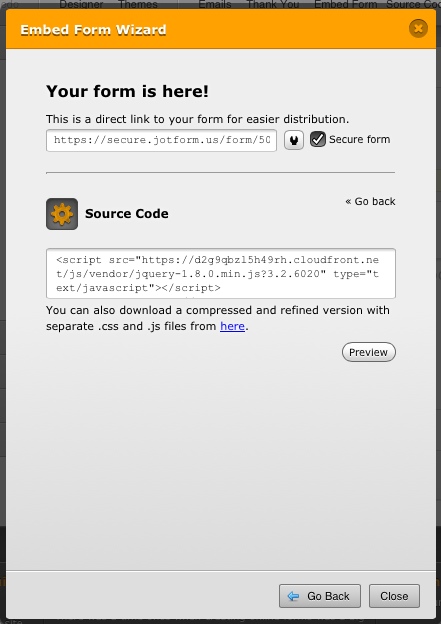
Now we could copy the source code presented there, or we can use the download link it provides. Personally, we chose the latter option, just because we wanted a back-up copy of the original code. Which you choose is a matter of personal preference.
So cut it down severely until all you have left is the actual form and its necessary inputs and labels:
That means we can apply our own visual styles without being hindered by JotForm’s choices. You did let your designer format your webforms, didn’t you?
Now we were quite rigorous; if your form were to contain a captcha or a calendar widget, you should find and keep the appropriate js and css rules.
1. The xtend.htmls file inside the folder of the web page dedicated to show the form;
2. A newly created translation file in the Publizjr translations folder, which you then invoke into the dedicated template using the Publizjr API method $page->addTranslation( "jotformContactInfo" );
Use the 1st way if chances are your site will use this form just once. Use the 2nd way if your website is likely to show this form in multiple webpages.
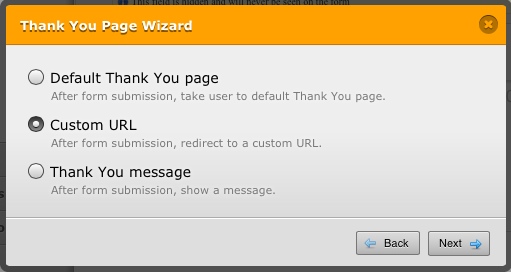
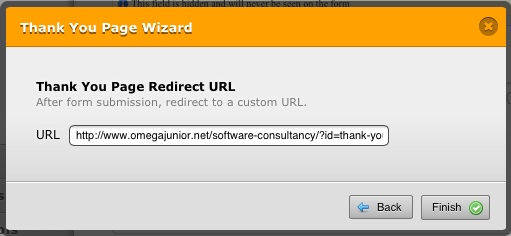
Pressing that “Thank You” button opens a dialog that lets us choose that we want JotForm to redirect users to a dedicated web page.
Of course you need to create a webpage for this particular event, so we can track it using Google Analytics. And as you know, creating web pages with Publizjr is simple and straight-forward!
Then you create a simple form with just a single textarea (let us name it “Contact Info”) and a single submit button (which we title “Send”). You could title the form “Contact Me”, for easy recognition later.
Do not worry about any of the other properties, like the visual design or whether the field is required: we are not going to use them in this example.
How to Retrieve the Form’s Source Code
Select the “source code” option above the form designer. It lives inside the “setup & embed” tab.This opens the “Source Code” dialog which sports a button labeled “Embed Options”:
Pressing that button opens the “Embed Form Wizard” dialog:
Here, we first enable the choice to post form submissions via a secured connection:
Then we press the icon labeled “source”, which slides the source code text box into view:
Now we could copy the source code presented there, or we can use the download link it provides. Personally, we chose the latter option, just because we wanted a back-up copy of the original code. Which you choose is a matter of personal preference.
Removing Clutter
Now you have a whole bunch of html, js, and css source code, which you really don’t all need for a form this simple. JotForm will include rules for widgets you did not even add to your form!So cut it down severely until all you have left is the actual form and its necessary inputs and labels:
<form action="https://secure.jotform.us/submit.php"

  method="post" accept-charset="utf-8">

  <input type="hidden" name="formID" value="12345678909876" />

  <label for="q1_contactInfo">Contact Info</label><br />

  <textarea id="q1_contactInfo"

    name="q1_contactInfo"

    cols="60" rows="6"

    maxlength="400"></textarea>

  <br />

  <input type="submit" value="Send" />

  <div style="display:none">

     Should be Empty: <input type="text" name="website" value="" />

  </div>

  <input type="hidden" id="simple_spc" name="simple_spc" value="12345678909876" />

  <script type="text/javascript">/* <![CDATA[ */

  document.getElementById("si" + "mple" + "_spc").value = "12345678909876-12345678909876";

  /* ]]> */</script>

</form>

<img src="//events.jotform.com/form/12345678909876"

  style="display:none" />
That means we can apply our own visual styles without being hindered by JotForm’s choices. You did let your designer format your webforms, didn’t you?
Now we were quite rigorous; if your form were to contain a captcha or a calendar widget, you should find and keep the appropriate js and css rules.
Let Publizjr Display the Form
This above html and javascript mark-up we can throw into 1 of 2 places Publizjr 2 recognises:1. The xtend.htmls file inside the folder of the web page dedicated to show the form;
2. A newly created translation file in the Publizjr translations folder, which you then invoke into the dedicated template using the Publizjr API method $page->addTranslation( "jotformContactInfo" );
Use the 1st way if chances are your site will use this form just once. Use the 2nd way if your website is likely to show this form in multiple webpages.
Thank-You Page for Conversion Analytics
Go back to JotForm.com and look for the “Thank You” button in the form menu. Just like the “Source Code” button it lives in the tab labeled “Setup & Embed”:Pressing that “Thank You” button opens a dialog that lets us choose that we want JotForm to redirect users to a dedicated web page.
Of course you need to create a webpage for this particular event, so we can track it using Google Analytics. And as you know, creating web pages with Publizjr is simple and straight-forward!
What Webform Providers did You Integrate?
We would love to hear your story! What did you mash up with Publizjr, and how did you go about making it all work? What challenges did you have to overcome? Let us know in the comments below!Interested?
Let's meet for coffee or over lunch. Talk to me using this form.